How to Build Your Own ChatGPT Backend with NestJS and OpenAI
Your own API instead of vendor UI. Many people use ChatGPT via OpenAI’s official web interface, but what if you want to integrate the AI into your own application? In this tutorial, I’ll show you step by step how to build your own ChatGPT backend using NestJS (a Node.js framework) and the OpenAI API. Instead of just using the vendor UI, you’ll create your own API as a gateway to ChatGPT. Don’t worry if you have little experience with TypeScript—we’ll go through everything in a beginner-friendly way. By the end, you’ll have a working server that receives requests, forwards them to OpenAI, and streams the responses back to your client, complete with authentication, logging, tests, and deployment. Let’s get started!
Architecture Overview (Gateway, Rate Limits, Logging)
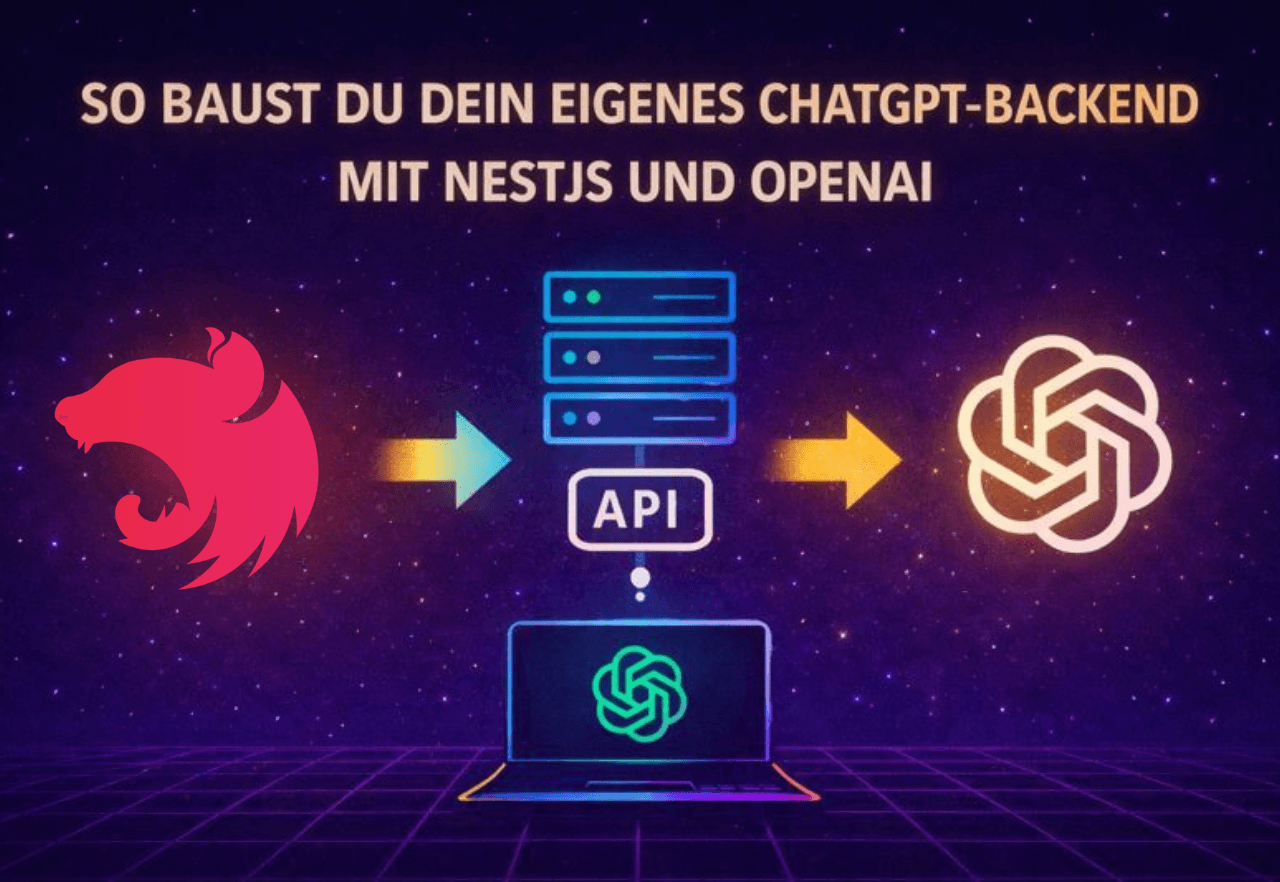
Before we dive into the code, let’s look at the architecture. Our NestJS backend acts as a gateway between the client and OpenAI. That means your application (whether it’s a web app, mobile app, or another client) sends requests to your NestJS API backend instead of directly to ChatGPT. The simplified flow looks like this:
Client → NestJS Backend: The client sends a request with a user input (prompt) to an endpoint on your NestJS server, e.g., POST /chat.
NestJS Backend → OpenAI: Your backend receives the request in the controller and uses a service to call the OpenAI API (ChatGPT). The request to OpenAI includes the prompt and possibly other parameters (model, max tokens, etc.).
OpenAI → NestJS Backend: The OpenAI API generates a response and sends it back to your backend.
NestJS Backend → Client: Your backend processes the response (e.g., extracts the AI text) and returns it as an HTTP response to the client. Optionally, streaming can be used here so the client receives the response token by token as it’s generated.
Why go through your own backend? This gives you full control: You can implement rate limiting to prevent users or bugs from sending too many requests per minute and blowing your OpenAI quota. You can add logging to track which prompts were sent and how long responses take, which helps with debugging and monitoring. A custom backend also lets you add additional logic, such as post-processing AI responses, caching frequent answers, or filtering out unwanted content.
In summary, NestJS provides a solid foundation for a scalable, secure API server. In the next sections, we’ll set up the NestJS project and add the desired features step by step.
NestJS Setup (Module, Controller, Service)
First, we’ll set up a new NestJS project and create the basic building blocks: Module, Controller, and Service for our ChatGPT integration.
Create the project: If you haven’t already, install the NestJS CLI (Command Line Interface) with the following command in your terminal:npm install -g @nestjs/cli
Then create a new project, e.g., named chatgpt-backend:
nest new chatgpt-backendFollow the CLI instructions (for this example, we’ll use npm as the package manager). Then you can switch to the project directory:
cd chatgpt-backendThe NestJS CLI has created a basic structure. Take a quick look: In the src/ folder, you’ll find app.module.ts (root module) and app.controller.ts/app.service.ts (example controller and service). For our ChatGPT backend, we’ll now create our own module area, e.g., ChatModule with a ChatService and ChatController (you could also call it OpenAIModule/OpenAIService—we’ll stick with Chat for clarity).
Install required packages: We’ll be using the OpenAI API, for which there’s an official Node.js SDK. Install the OpenAI package in your project:
npm install openaiIt’s also a good idea to use the NestJS Config module to load environment variables like the API key:
npm install @nestjs/configNow we can set up our chat module:
ChatService: The service handles communication with OpenAI. Here, we’ll load the API key and send a request to the ChatGPT endpoint.
ChatController: The controller provides an HTTP interface (e.g., POST /chat), receives user input, and returns the response. It calls the ChatService for this.
First, create the module and files. With the NestJS CLI, this is easy:
nest g module chat
nest g service chat
nest g controller chat
This command creates chat.module.ts, chat.service.ts, and chat.controller.ts under src/chat/. Nest automatically registers the service in the module.
Implement ChatService: Open src/chat/chat.service.ts. We import the OpenAI SDK and configure it with our API key. It’s best to store the key in an environment variable (e.g., in a .env file in the project root):
# .env
OPENAI_API_KEY=your-openai-api-key
Include the ConfigModule in app.module.ts so .env is read:
import { ConfigModule } from '@nestjs/config';

@Module({
  imports: [ConfigModule.forRoot({ isGlobal: true }), ChatModule /* ... */],
  // ...
})
export class AppModule {}
With isGlobal: true, the ConfigModule is available everywhere without needing to import it in every module.
Now for the ChatService (TypeScript code, but we’ll explain it step by step):
// src/chat/chat.service.ts
import { Injectable } from '@nestjs/common';
import { ConfigService } from '@nestjs/config';
import { Configuration, OpenAIApi } from 'openai';

@Injectable()
export class ChatService {
  private openai: OpenAI;

  constructor() {
    // Initialize OpenAI with API key from environment variables
    const apiKey = process.env.OPENAI_API_KEY;
    this.openai = new OpenAI({ apiKey });
  }

  async generateAnswer(prompt: string): Promise<string> {
    // Send request to OpenAI (ChatCompletion)
    const response = await this.openai.responses.create({
      model: 'gpt-5-nano',
      input: prompt,
    });

    return response.output_text || 'No answer';
  }
}
Let’s look at this: In the constructor (constructor(private configService: ConfigService)), we load the API key via ConfigService. Then we create an OpenAIApi object (part of the SDK), which we can use to make requests. The generateAnswer method takes a prompt (the user text) and calls this.openai.responses.create, which corresponds to the ChatGPT API call. We specify the model (here gpt-5-nano) and pass the user’s message. The API responds with a result, from which we extract the answer text output_text. We return this. (Note: Here we simplify and ignore multiple answers. For a simple chatbot, this is sufficient.)
Implement ChatController: Open src/chat/chat.controller.ts. Here we define an endpoint, e.g., POST /chat, that receives a request. The user’s prompt should come in the body of the request (as JSON { "prompt": "Hello, how are you?" }). We then call the ChatService and send its response back.
// src/chat/chat.controller.ts
import { Controller, Post, Body } from '@nestjs/common';
import { ChatService } from './chat.service';

@Controller('chat')
export class ChatController {
  constructor(private readonly chatService: ChatService) {}

  @Post()
  async createChat(@Body('prompt') prompt: string) {
    const answer = await this.chatService.generateAnswer(prompt);
    return { answer };
  }
}
This simple controller has a POST handler without additional protection (we’ll handle auth in a moment). It expects a request body field prompt (NestJS can extract individual fields via @Body('prompt')). It then calls chatService.generateAnswer(prompt) and returns the result as JSON, e.g., { "answer": "I’m fine, thanks for asking!" }.
Now we already have the basic structure of our backend: A client can send a POST request to /chat with the desired prompt and receives the AI response. Before we try it out, let’s take care of securing it and some important features.
Auth (API Keys/JWT), Config & Secrets
Since our API ultimately has access to your OpenAI key and can potentially incur costs, we shouldn’t leave it open on the internet. There are two common approaches to add authentication (auth):
API keys for clients: You could assign your own API key, which the client must send with each request (e.g., as header x-api-key: <secret key>). Your NestJS server then checks this key on every request.
JWT (JSON Web Tokens): If you have user management, you could let users log in and issue JWTs. The chat endpoint would then be protected by a JWT guard, and only accessible with a valid token.
For a simple scenario, the first option—a static key—is often sufficient. Since this tutorial is for beginners, we’ll briefly outline both options:
API Key Guard (simple): Define a secret key in your .env, e.g., API_KEY=my-tutorial-key. Write a simple guard (a class that implements NestJS’s CanActivate) or middleware that checks a specific header on each request. Example as middleware:
// src/auth/apikey.middleware.ts (example)
import { Injectable, NestMiddleware, UnauthorizedException } from '@nestjs/common';
import { Request, Response, NextFunction } from 'express';

@Injectable()
export class ApiKeyMiddleware implements NestMiddleware {
  use(req: Request, res: Response, next: NextFunction) {
    const apiKeyHeader = req.headers['x-api-key'];
    const apiKey = process.env.API_KEY; // can also be loaded via ConfigService
    if (!apiKeyHeader || apiKeyHeader !== apiKey) {
      throw new UnauthorizedException('Invalid API Key');
    }
    next();
  }
}
You can register this middleware in main.ts or in the AppModule via app.use(...). It checks on every request whether a correct key was sent.
JWT Auth (advanced): NestJS offers robust JWT support with Passport.js integration. You would create an auth module, define a JWT strategy that reads and validates the Authorization header, and protect your controller with @UseGuards(JwtAuthGuard). For this tutorial, we’ll assume you’re using either a static key or deploying in a protected environment. Details on JWT are beyond this scope, but if you have user accounts, that’s the way to go.
Important for both cases: never hardcode secrets in your code. We’ve already seen how to put the OpenAI API key in .env and load it via ConfigService. Do the same with your own API key or JWT secret. For example:
OPENAI_API_KEY=sk-... (your OpenAI key)
API_KEY=12345-abcde (your own API key for clients)
JWT_SECRET=aSecret (secret for JWT signing)
NestJS’s ConfigModule makes process.env[...] available everywhere, or you can use configService.get('API_KEY'). This keeps all your sensitive credentials out of your source code. Make sure to add .env to your .gitignore so nothing accidentally gets into your repository.
Organize config: For larger projects, you can outsource configuration to separate files and load them in the ConfigModule, but for our purposes, the .env solution is enough. Just remember to set these environment variables appropriately during deployment (more on that later).
With authentication, we’ve now prevented unauthorized access to our endpoint. If you’re developing and testing locally, you can disable these security mechanisms at first, but be sure to enable them before public deployment!
Streaming Responses & Error Handling
A cool improvement to our backend is streaming responses. By default, the client waits until ChatGPT has generated the entire response and then receives the whole text at once. With streaming, you can show the user text piece by piece as the AI generates it. This feels much more responsive (as seen in the ChatGPT web interface, where the answer appears word by word).
How do you implement streaming? The OpenAI API offers a stream: true parameter for this. However, the OpenAI Node client then returns a stream (a data stream) that we need to process. There are two common approaches:
Server-Sent Events (SSE): NestJS supports SSE out of the box. In the controller, you can use @Sse() instead of @Post() and return an Observable. In your service, you’d read the stream data from OpenAI in chunks and send them as events using observer.next(data). The client (browser) can receive these events via EventSource and display them live.
HTTP Chunked Streaming: Alternatively, you can use the low-level HTTP response. If you inject the @Res() response object (from Express) in the NestJS controller, you could call res.write(chunk) in a loop as you read the OpenAI stream, and finally res.end(). This requires a bit more manual work but is doable.
For beginners, SSE is a bit easier since Nest handles the encapsulated Observable. A minimal example might look like this:
// in ChatService, pseudo-code:
async streamAnswer(prompt: string): Promise<AsyncIterable<string>> {
  const response= await this.openai.responses.create(
    {
      model: 'gpt-5-nano',
      input: prompt,
      stream: true // may be needed, depending on client lib
    }
  );
  // response is a stream/AsyncIterable
  return response.output_text; // returns an async iterator
}

// in ChatController
import { Sse } from '@nestjs/common';
import { Observable } from 'rxjs';

@Sse('chat-stream')
streamChat(@Query('prompt') prompt: string): Observable<MessageEvent> {
  return this.chatService.streamAnswer(prompt);
}
Here we have an SSE endpoint GET /chat/chat-stream?prompt=.... The service returns an AsyncIterable or Observable. In the real implementation, you’d need to extract individual messages from the OpenAI stream (usually JSON chunks you can parse). You send each part with observer.next({ data: chunkContent }). The client receives multiple events until the response is complete.
Note: Streaming is an advanced feature. If it’s overwhelming, you can skip it for now. Your API will work fine without streaming; the user just has to wait for the full response. SSE also requires a suitable client, e.g., in the browser with JavaScript new EventSource('/chat/chat-stream?prompt=Hello') or you can implement it in your frontend.
Now for error handling. The OpenAI API call can throw errors, e.g., if your API key is missing/invalid, you exceed the rate limit, or the input violates guidelines. We should catch these errors so our server doesn’t just crash with status 500.
In ChatService, you can wrap the call in try/catch:
async generateAnswer(prompt: string): Promise<string> {
  try {
    const response = await this.openai.responses.create({ ... });
    return response.output_text || '';
  } catch (error) {
    // Evaluate and convert error
    if (error.response) {
      // OpenAI returns errors with status and message
      const status = error.response.status;
      const message = error.response.data?.error?.message || 'Unknown error';
      // Throw appropriate HTTP error depending on the error
      if (status === 401) {
        throw new UnauthorizedException('OpenAI API key invalid or rejected');
      } else if (status === 429) {
        throw new TooManyRequestsException('Rate limit reached, please try again later');
      } else {
        throw new InternalServerErrorException('Error from AI service: ' + message);
      }
    } else {
      // No response object, possibly network failure
      throw new InternalServerErrorException('No connection to OpenAI API');
    }
  }
}
NestJS offers many predefined exceptions (UnauthorizedException, BadRequestException, InternalServerErrorException, etc.) that automatically result in appropriate HTTP status codes. By throwing specific errors as such exceptions, the client gets meaningful responses. For example, if OpenAI returns 429 (Too Many Requests), we pass that as 429 to our client with a brief explanation.
You can also write a global exception filter or use the built-in logger to log errors. Especially during development, it’s helpful to output all errors with console.error(error) (or the Nest logger) to find the cause.
Observability (Req IDs, Tracing, Metrics)
In production applications, you’ll eventually want to set up observability, a catch-all term for traceability and monitoring of your system. Three important points are request IDs, tracing, and metrics. Here’s a brief overview:
Request IDs: It’s useful to give each request a unique ID. This lets you track a specific request across all logs. NestJS lets you add your own middleware. For example, you could generate a UUID when a request comes in and store it in the request object (or as an HTTP header). With a logging interceptor, this ID can be included in every log entry. That way, you can see exactly which log messages belong to which request. Some logging libraries like pino or winston can be integrated with Nest to handle request IDs automatically. For starters, you can simply assign an X-Request-ID via middleware and return it in the response.
Tracing: Goes even deeper than request IDs. With distributed tracing (e.g., via OpenTelemetry), you can measure how long each step of a request takes from receipt to response, including sub-calls like communication with OpenAI. This requires some setup (there’s a @nestjs/terminus package for health checks and OpenTelemetry, or you can use APM tools like Jaeger, Zipkin, Datadog). For our tutorial, just be aware: If your ChatGPT backend grows or becomes part of a microservice landscape, it’s worth introducing tracing to uncover performance issues.
Metrics: These are numbers that quantify your service’s behavior. For example, the number of requests per period, average response time, load, error rate, etc. NestJS can get Prometheus support (with libraries that provide a /metrics endpoint). This lets you measure, for example, how many chat requests were made or how often the rate limit was hit. You can also log simple metrics manually or collect them with a monitoring service. You don’t need everything at the start, but at least collect basic data (e.g., simple logs or counters) to keep an overview.
Logging: Don’t forget, logging in general is part of observability. NestJS has a built-in logger (console.log works for smaller setups). Log important events, such as incoming requests (maybe including the prompt, unless you want to avoid that for privacy), responses (or at least the fact that a response was sent and its size), errors with stack trace, etc. Later, you can send logs to systems like Elasticsearch/Kibana or CloudWatch for easy searching.
To sum up this section: As you build your ChatGPT backend, it’s good to plan for transparency from the start. That way, you can react better if something goes wrong or needs optimization. For our simple tutorial app, just be aware that these mechanisms exist, as full implementation would go beyond our scope.
Deployment
You now have a working ChatGPT backend with NestJS. The final step is deployment. Depending on your needs, there are many options:
Own server/VPS: You can deploy a Docker container on your own server (e.g., via SSH and Docker CLI, or with Docker Compose). Make sure port 3000 is open or map it to 80/443 behind a proxy.
Cloud services: Platforms like Heroku, Render, Railway, or Fly.io can deploy Node apps or Docker containers directly. AWS (Elastic Beanstalk, ECS, etc.), GCP (Cloud Run), or Azure also offer easy ways to run containers. For beginners, services like Render or Heroku are popular since you don’t need much infrastructure knowledge; you can usually connect a GitHub repo and deployment happens automatically.
Kubernetes: In larger projects, containers are often run on Kubernetes. That’s definitely beyond our scope here. But with a Docker image, you’d also have a unit you could deploy there.
It’s important to set the necessary environment variables (OpenAI key, possibly API key/JWT secret) in the deployment environment. Store these securely in the cloud service’s settings instead of writing them into the repo.
After deployment, your ChatGPT backend should be accessible from anywhere (if intended). For example, a frontend app could now send requests to https://your-domain.tld/chat and our NestJS server will relay them to the OpenAI service.
Don’t forget to keep an eye on logging and monitoring in production. At first, simple console logging (which you can access on Heroku, for example) may be enough. Later, you can add tools to monitor usage and performance.
Next Steps
Done! You’ve gotten an overview of how to create your own ChatGPT backend with NestJS and OpenAI, from architecture and authentication to deployment. This tutorial should make it easier for you to get started, even without deep TypeScript knowledge.
Feel free to experiment further: Add new features, connect a frontend, or extend the service with features like conversation history, different models (e.g., GPT-4), or a small interface for prompt moderation.
I hope this NestJS OpenAI tutorial has shown you that you can build a ChatGPT backend yourself with manageable effort. Good luck coding and experimenting! Stay curious and have fun developing your own AI backend. 🚀
Comments
Please sign in to leave a comment.